
Replacing The Onboard Fuse On Your Propex Heater
Posted by Propex North America on Mar 28th 2025
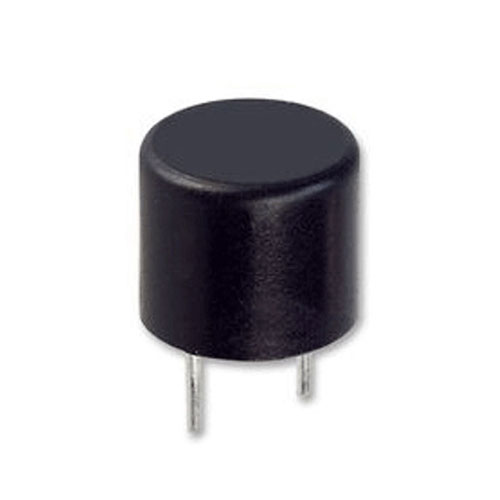
The Propex line of heaters is designed with an onboard fuse to protect the heaters’ sensitive central circuitry. Consider this fuse your heater's front line of defense against an over-current condition for your heater.
To protect this fuse, it is imperative that there is no 12-volt power to the unit when connecting the thermostat to or disconnecting it from your heater unit. In other words, connect the thermostat and THEN connect the 12-volt power. If this sequence is not followed, the power surge on re-connection may cause the fuse to blow.
A sure sign your fuse has blown is that there is no initial fan noise when connecting the unit to 12-volt power. In normal operation there is a half second whir of fan noise when the unit first gets power. If you do not hear the fan, consider the probability that your fuse may be blown.
The onboard fuse is relatively easy to test and replace.
Start by disconnecting the 12-volt power to the heater unit!!!
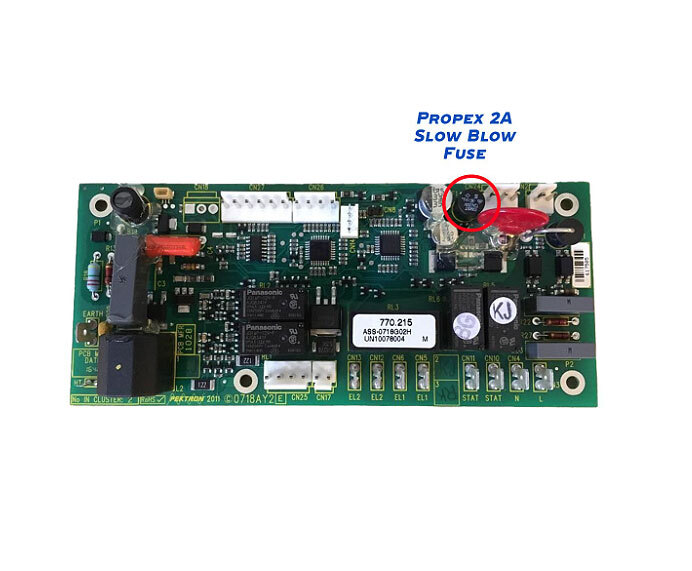
On HS2000 and HS2800 heaters manufactured from 2013-onward the fuse is replaced by opening the access panel on the heater unit and carefully pulling the fuse from its holder.
You can verify that the fuse is blown using the ohmmeter function on your multi-meter to verify continuity between the two legs of the fuse. No continuity = blown fuse.
On HS2211 models it's a little trickier to access the fuse but you can do it by unscrewing the large plastic end cap that the 60mm cabin air ducting is attached to.
Replace the fuse by carefully inserting the two legs into the fuse holder on the circuit board. Orientation of the fuse doesn't matter.
Re-connect the 12-volt power and you should hear the fan run for approximately half a second.
Test heater function.